注: GitHub 托管的运行器目前在 GitHub Enterprise Server 上不受支持。 您可以在 GitHub 公共路线图 上查看有关未来支持计划的更多信息。
Introduction
In this guide, you'll create a GitHub Actions workflow to test your code and then publish it to GitHub Packages.
Publishing your package
-
Create a new repository on GitHub, adding the
.gitignorefor Node. Create a private repository if you’d like to delete this package later, public packages cannot be deleted. For more information, see "Creating a new repository." -
Clone the repository to your local machine.
$ git clone https://github.com/YOUR-USERNAME/YOUR-REPOSITORY.git $ cd YOUR-REPOSITORY -
Create an
index.jsfile and add a basic alert to say "Hello world!"JavaScript alert("Hello, World!"); -
Initialize an npm package with
npm init. In the package initialization wizard, enter your package with the name:@YOUR-USERNAME/YOUR-REPOSITORY, and set the test script toexit 0. This will generate apackage.jsonfile with information about your package.$ npm init ... package name: @YOUR-USERNAME/YOUR-REPOSITORY ... test command: exit 0 ... -
Run
npm installto generate thepackage-lock.jsonfile, then commit and push your changes to GitHub.$ npm install $ git add index.js package.json package-lock.json $ git commit -m "initialize npm package" $ git push -
Create a
.github/workflowsdirectory. In that directory, create a file namedrelease-package.yml. -
Copy the following YAML content into the
release-package.ymlfile.YAML name: Node.js Package on: release: types: [created] jobs: build: runs-on: ubuntu-latest steps: - uses: actions/checkout@v2 - uses: actions/setup-node@v2 with: node-version: 12 - run: npm ci - run: npm test publish-gpr: needs: build runs-on: ubuntu-latest steps: - uses: actions/checkout@v2 - uses: actions/setup-node@v2 with: node-version: 12 registry-url: https://npm.pkg.github.com/ - run: npm ci - run: npm publish env: NODE_AUTH_TOKEN: ${{secrets.GITHUB_TOKEN}} -
Tell NPM which scope and registry to publish packages to using one of the following methods:
- Add an NPM configuration file for the repository by creating a
.npmrcfile in the root directory with the contents:@YOUR-USERNAME:registry=https://npm.pkg.github.com - Edit the
package.jsonfile and specify thepublishConfigkey:"publishConfig": { "@YOUR-USERNAME:registry": "https://npm.pkg.github.com" }
- Add an NPM configuration file for the repository by creating a
-
Commit and push your changes to GitHub.
$ git add .github/workflows/release-package.yml # Also add the file you created or edited in the previous step. $ git add .npmrc or package.json $ git commit -m "workflow to publish package" $ git push -
The workflow that you created will run whenever a new release is created in your repository. If the tests pass, then the package will be published to GitHub Packages.
To test this out, navigate to the Code tab in your repository and create a new release. For more information, see "Managing releases in a repository."
Viewing your published package
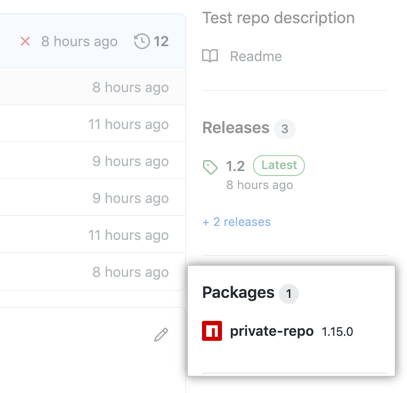
You can view all of the packages you have published.
-
在 your GitHub Enterprise Server instance 上,导航到仓库的主页面。
-
在文件列表右侧,单击 Packages(包)。

-
单击要查看的包的名称。

Installing a published package
Now that you've published the package, you'll want to use it as a dependency across your projects. For more information, see "Working with the npm registry."
Next steps
The basic workflow you just added runs any time a new release is created in your repository. But this is only the beginning of what you can do with GitHub Packages. You can publish your package to multiple registries with a single workflow, trigger the workflow to run on different events such as a merged pull request, manage containers, and more.
Combining GitHub Packages and GitHub Actions can help you automate nearly every aspect of your application development processes. Ready to get started? Here are some helpful resources for taking your next steps with GitHub Packages and GitHub Actions:
- "Learn GitHub Packages" for an in-depth tutorial on GitHub Packages
- "Learn GitHub Actions" for an in-depth tutorial on GitHub Actions
- "Working with a GitHub Packages registry" for specific uses cases and examples