About sponsorship tiers
You can publish up to 10 one-time sponsorship tiers and 10 monthly tiers for sponsors to choose from. Each tier has its own one-time or monthly payment amount in US dollars. Publishing tiers is optional.
You can customize the rewards for each tier. For example, rewards for a tier could include:
- Early access to new versions
- Logo or name in README
- Weekly newsletter updates
- Other rewards your sponsors would enjoy ✨
You can give all sponsors in a tier access to a private repository by adding the repository to the tier. For more information, see "Managing your sponsorship tiers."
You can include a welcome message with information about accessing or receiving rewards, which will be visible after payment and in the welcome email.
Once you have published a tier, you cannot edit the price of that tier. Instead, you must retire the tier and create a new tier. Existing sponsors will remain on the retired tier until they change their sponsorship tier, cancel their sponsorship, or their one-time sponsorship period expires.
The maximum price is US$12,000 per month.
Adding a tier
-
In the upper-right corner of any page, click your profile photo, then click Your sponsors.
-
If a list of your sponsored and eligible accounts is shown, to the right of the account you want to manage, click Dashboard.
-
On the left sidebar, click Sponsor tiers.
-
If you are setting up tiers for the first time, we recommend you review the suggested tier examples to see how some other open source contributors have set up GitHub Sponsors. Decide whether you want to start with some suggested draft tiers, which you can customize in the tier editor.
- To use a suggested tier, select the rewards you'd like to include in your draft tier or tiers. Then, click Continue to tier editor.
- To create tiers without using with any of the draft suggestions, click Skip this step.
-
Optionally, in the text boxes in the "Custom amounts" section, type a recommended or minimum sponsorship amount. The minimum amount applies to both recurring and one-time sponsorships.
-
Optionally, to edit a draft tier, find the draft tier and click Edit.
-
To create a monthly tier, click Add a monthly tier at the right of the page. Alternatively, to create a tier for one-time payments, click One-time tiers and then click Add a one-time tier.
-
Type a price per month and description for the tier.
-
Optionally, to add a welcome message for the tier, select Display welcome message, then type your message in the text field that appears.
-
Click Save draft.
-
Proofread your tier, then click Publish tier.
Editing or retiring a tier
-
In the upper-right corner of any page, click your profile photo, then click Your sponsors.
-
If a list of your sponsored and eligible accounts is shown, to the right of the account you want to manage, click Dashboard.
-
On the left sidebar, click Sponsor tiers.
-
To the right of the tier you want to edit, click Edit.
Note
To see ideas of tier descriptions, scroll down.
-
Type a price per month and description for the tier.
-
Proofread your tier, then click Update.
-
To retire a tier, click Retire tier, then click OK.
Adding a repository to a sponsorship tier
You can give all sponsors in a tier access to a private repository by adding the repository to the tier.
About adding repositories to a sponsorship tier
To add a repository to a tier, the repository must be private and owned by an organization, and you must have admin access to the repository.
When you add a repository to a tier, GitHub will automatically send repository invitations to new sponsors and remove access when a sponsorship is canceled.
Only personal accounts, not organizations, can be invited to private repositories associated with a sponsorship tier.
You can also manually add or remove collaborators to the repository, and GitHub will not override these in the sync.
About transfers for repositories that are added to sponsorship tiers
If you transfer a repository that has been added to a sponsorship tier, sponsors who have access to the repository through the tier may be affected.
- If the sponsored profile is for an organization and the repository is transferred to a different organization, current sponsors will be transferred, but new sponsors will not be added. The new owner of the repository can remove existing sponsors.
- If the sponsored profile is for a personal account, the repository is transferred to an organization, and the personal account has admin access to the new repository, existing sponsors will be transferred, and new sponsors will continue to be added to the repository.
- If the repository is transferred to a personal account, all sponsors will be removed and new sponsors will not be added to the repository.
Adding a repository a sponsorship tier
-
In the upper-right corner of any page, click your profile photo, then click Your sponsors.
-
If a list of your sponsored and eligible accounts is shown, to the right of the account you want to manage, click Dashboard.
-
On the left sidebar, click Sponsor tiers.
-
To the right of the tier you want to edit, click Edit.
-
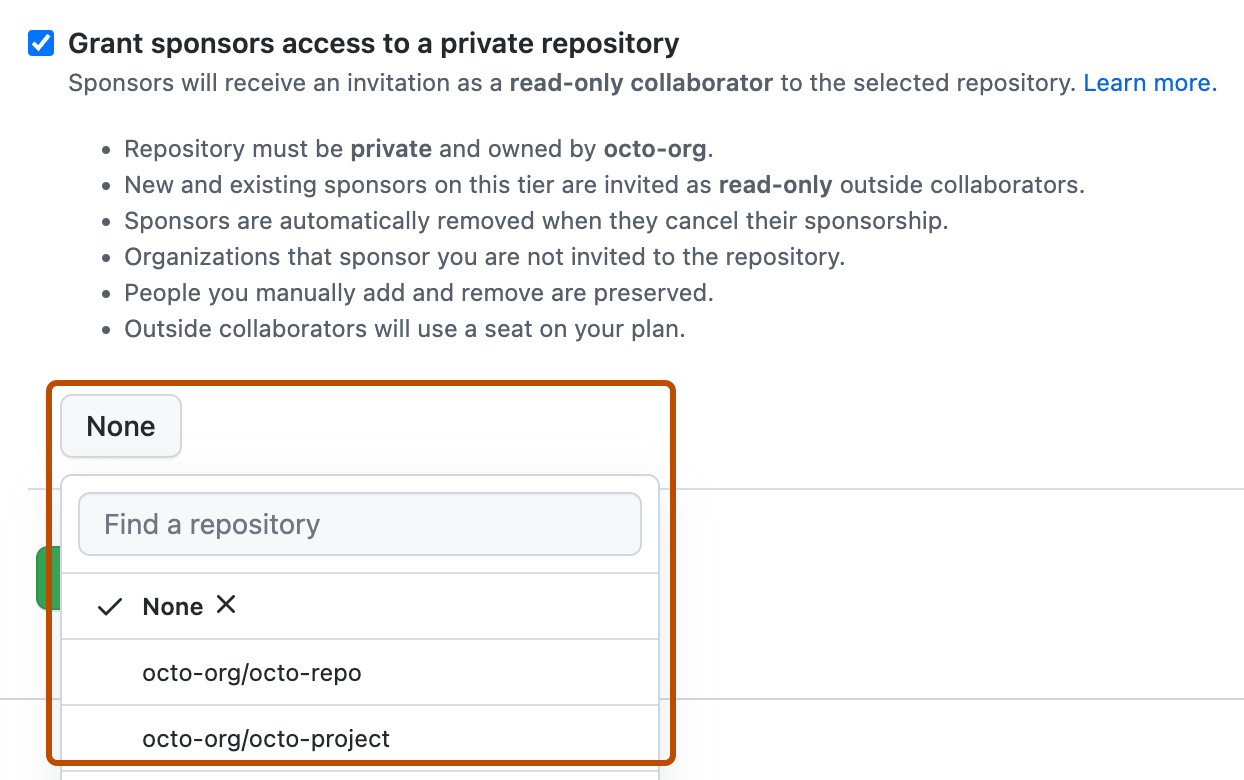
Select Grant sponsors access to a private repository.
-
Select the dropdown menu that appears and click the repository you want to add.

-
Proofread your tier, then click Update.